Megick · June 30, 2026 · 14 min read
2026 Beginner’s Guide to Avoiding AI Video Generator Pitfalls: Do Not Rush to Switch Models—Avoid These 10 Mistakes First
2026 Beginner’s Guide to Avoiding AI Video Generator Pitfalls: Do Not Rush to Switch Models—Avoid These 10 Mistakes First
AI video generation has moved beyond the stage of being a novelty.
The question now is no longer whether you can generate a video, but whether the result is actually usable. When beginners first get started, they often focus entirely on model rankings: which one looks the most realistic, which one is the most popular, and which one produces the best promotional footage.
But after a few rounds of actual production, most people realize that the number of unusable clips has far less to do with the model name than expected.
An unclear concept, an unstable first frame, overly vague prompts, too many actions packed into one shot, no editing rhythm, maxing out settings during testing—these are the things most likely to burn through generations and budget.
This article does not pile up tool names or rely on vague tricks. Treat it as a pre-shoot checklist for AI video. Run through it before every generation, and you will avoid a lot of wasted clips.
Some of the models and video capabilities mentioned in this article can be explored on Megick.com. If you are just getting started, you can also follow the Megick.com video-generation tutorials to run through a basic workflow first, then come back to this checklist.
1. The Main Point: The Biggest Beginner Problem Is Not a Weak Model, but Inputs That Do Not Think Like a Director
When people first use an AI video generator, they often write prompts like this:
A girl walking in a city, cinematic, premium, realistic, 4K.
This prompt may contain several keywords, but it provides very little actual information.
The model does not know where she is walking from or where she is going. It does not know whether the camera should follow her or remain fixed. It does not know whether the scene takes place in the morning, at sunset, or at night. It also does not know whether the video is intended for a vertical Douyin product recommendation, a Xiaohongshu cover video, or a brand commercial.
A more reliable version should read like a director giving instructions to a cinematographer:
9:16 vertical short video, nighttime city street corner, a young woman in a beige trench coat walks from the left side of the frame toward a neon storefront, low-angle camera slowly tracking her movement, wet pavement reflecting the lights after rain, realistic cinematic texture, natural movement, 5 seconds. Add subtitles and title in post-production.
The difference between the two prompts is obvious.
The second version clearly defines the image, subject, movement, camera, environment, aspect ratio, and post-production boundary. AI video generation in 2026 is no longer about “writing one sentence and waiting for a surprise.” It is about breaking shots into smaller pieces and making your intent clear.
2. Ten Common Beginner Mistakes: Every One of Them Can Waste Your Budget
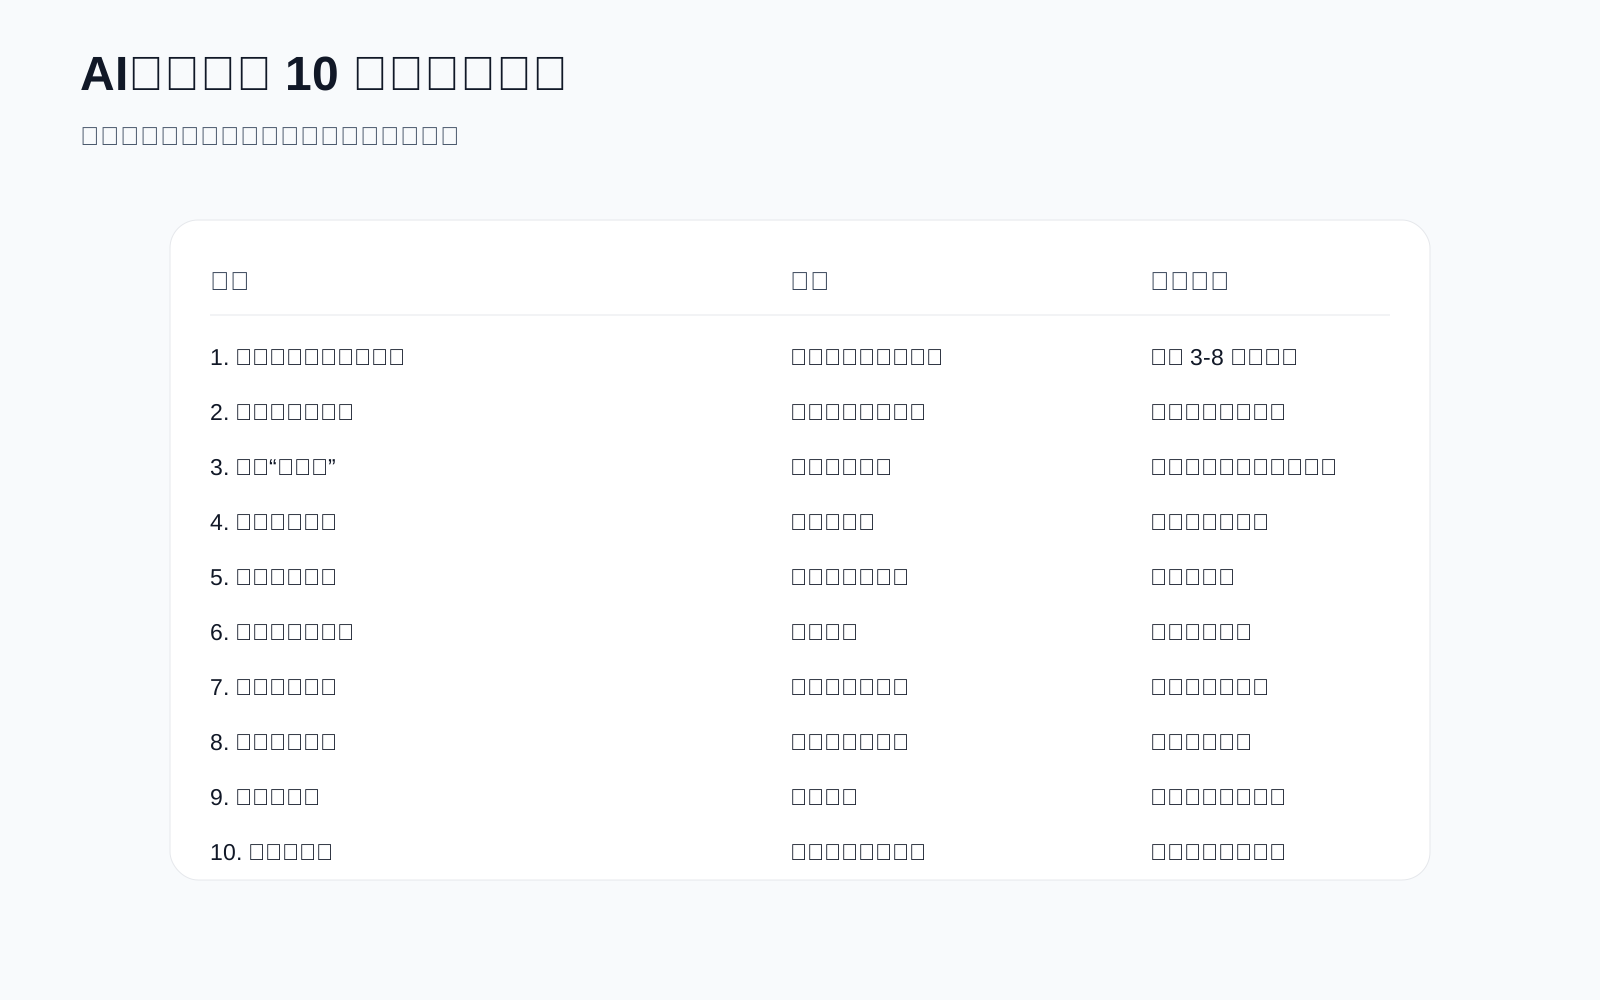
1. Trying to Generate an Entire Story in One Prompt
AI video struggles with prompts that try to do everything at once.
Many beginners put a full 30-second plot into one prompt: a character enters a room, notices a product, looks surprised, picks it up and tries it, the camera switches angles, and a brand slogan appears at the end.
The usual result is jumping actions, broken visual logic, and a scene that starts to fall apart in the final seconds.
A more stable approach is to split the story into individual shots:
- Shot one: the character enters the scene;
- Shot two: the character notices the product;
- Shot three: a hand close-up shows the product;
- Shot four: the character reacts with an expression;
- Shot five: add the title and key selling points in post-production.
For each generation, let the model complete only one primary action.
AI should generate the shots. Editing software should assemble the shots into a story. That is much closer to a real video-production workflow.
2. Generating Text-to-Video Without Creating a First Frame
Text-to-video is excellent for exploring ideas, but it is not ideal for producing final content immediately.
This is especially true for people, products, IP characters, and e-commerce assets. Without a first-frame reference, the model can easily drift in facial features, clothing, product appearance, and overall style.
A more reliable workflow is:
- Use AI image generation or existing assets to establish the first frame;
- Confirm the character, product, composition, and lighting;
- Use image-to-video to animate the scene.
Megick Studio is well suited to this workflow: generate stable product images, character images, or cover visuals first, then move into image-to-video generation. This way, every video does not have to start with a completely random visual style.
3. Writing Only “Premium,” “Cinematic,” or “Viral” Without Describing Specific Actions
“Premium,” “cinematic,” and “viral” are outcomes. They are not actions the model can execute directly.
What models can understand are visible actions: walking, turning around, pushing in, pulling back, raising a hand, smiling, wind moving the edge of clothing, liquid pouring into a cup, or the camera sliding across the edge of a product.
Turn abstract adjectives into visible actions, and your prompt becomes much more useful.
Weak version:
A premium skincare advertisement.
More usable version:
A transparent serum bottle stands in the center of a white marble surface. The camera slowly slides from the left side of the bottle toward the front. The background contains soft morning light and pale curtains. Subtle highlights move across the bottle. The image is clean, realistic, and has the texture of a commercial advertisement.
4. Repeating Every Detail Already Present in an Image-to-Video Input
The input image already provides the subject, composition, and scene information.
A common beginner mistake is describing the clothing color, facial features, background objects, and object positions all over again in the prompt. This can confuse the model about what matters most, causing the subject to distort or movement to become unclear.
For image-to-video prompts, focus on how the image should move.
For example:
The camera slowly pushes in. The person gently turns their head toward the camera. Their hair moves slightly in the breeze. The background remains stable.
Do not describe the entire image again.
5. Filling the Prompt With Too Many Negative Prompts
Many people bring habits from the AI image-generation world:
No distortion, no extra hands, no blur, no watermark, no random movement, no face changes...
Negative prompts are not completely useless, but they should not become the main body of the prompt.
Many video models rely more heavily on positive descriptions. Instead of writing “do not move randomly,” write “the camera remains stable.” Instead of writing “do not change the face,” use a first frame to lock in the character, then write “the person keeps a natural expression and nods slightly.”
What AI video most needs to know is still what should happen in the scene.
6. Ignoring Platform Aspect Ratios and Cropping Later
Douyin, Kuaishou, and Xiaohongshu are generally better suited to 9:16 vertical content.
Official WeChat articles, horizontal Bilibili explainers, and website hero videos more commonly use 16:9. E-commerce product-detail pages may require 1:1 or 4:5 formats.
Aspect ratio is not something to handle with a quick crop at the end. It determines subject placement, negative space, title space, and camera-movement direction.
For vertical content, keep the subject within a safe area. Reserve title space at the top or upper-middle portion of the frame, and avoid placing key products too close to the edges. Many horizontal videos look fine on their own, but once cropped into vertical format, faces, product details, or important actions get cut off.
7. Letting AI Generate Chinese Headlines and Selling Points Directly
Text inside AI-generated video remains a high-risk area.
Even though some models can now handle simple English words or short phrases, Chinese headlines, promotional information, brand selling points, and pricing details are still much better added in post-production.
The reasons are straightforward:
- More controllable;
- Easier to revise;
- More consistent typography;
- Less likely to generate garbled text;
- Better suited to commercial campaigns.
Let AI handle the visuals. Add titles, prices, campaign information, disclaimers, subtitles, and brand copy during editing or design. It will be much more reliable.
8. Trying to Make the Final Video on the First Generation and Skipping Tests
This is one of the easiest ways to waste money.
People often start with the highest resolution, longest duration, and highest-quality settings. Then they discover the creative direction was wrong and the entire video is unusable.
A more sensible approach is to test three lower-cost directions first.
For example, for the same product video, you could test:
- A slow camera push-in;
- A hand picking up the product;
- Liquid movement or material transformation.
First identify which direction is the most stable and best aligned with the brand, then scale it into the final shot.
When exploring models on Megick.com, separate the testing phase from the final-production phase. Use the first phase to evaluate motion direction and composition. Use the second phase for image quality, details, and stability.
9. Ignoring Audio, Rhythm, and Editing Beats
A video is not a moving image.
Many AI videos look fine visually but fail to hold attention or achieve completion rates after publishing. The issue is often not the model. It is the pacing.
This is especially important on short-video platforms:
- The first second determines whether users stop scrolling;
- The first three seconds determine whether users keep watching;
- Only after that do explanation, selling points, and conversion matter.
Beginners can start with this rhythm:
| Time Range | Content Task |
|---|---|
| 0–1 second | Show conflict, result, or a high-information visual |
| 1–3 seconds | Show action or transformation |
| 3–5 seconds | Introduce a selling point or emotional memory point |
| After 5 seconds | Move into explanation, tutorial, or conversion |
If the model supports audio prompting, you can describe environmental sounds, action sounds, or atmosphere sounds.
If audio quality is unstable, add music, sound effects, and subtitles in post-production. Do not force one generation to handle every task at once.
10. Not Saving Parameters, Making Successful Shots Impossible to Reproduce
Many people accidentally generate a great video, then when they try to recreate it later, all they have is:
Something similar to that feeling.
That is basically the same as starting from scratch.
At minimum, save these seven items for every useful generation:
- Model;
- Video aspect ratio;
- Duration;
- First-frame image;
- Prompt;
- Seed or reference settings;
- Post-production treatment.
When building a content matrix, these records become production assets. The real value is not only the finished video. It is knowing why it worked.
3. The Most Reliable AI Video Generation Workflow for Beginners in 2026
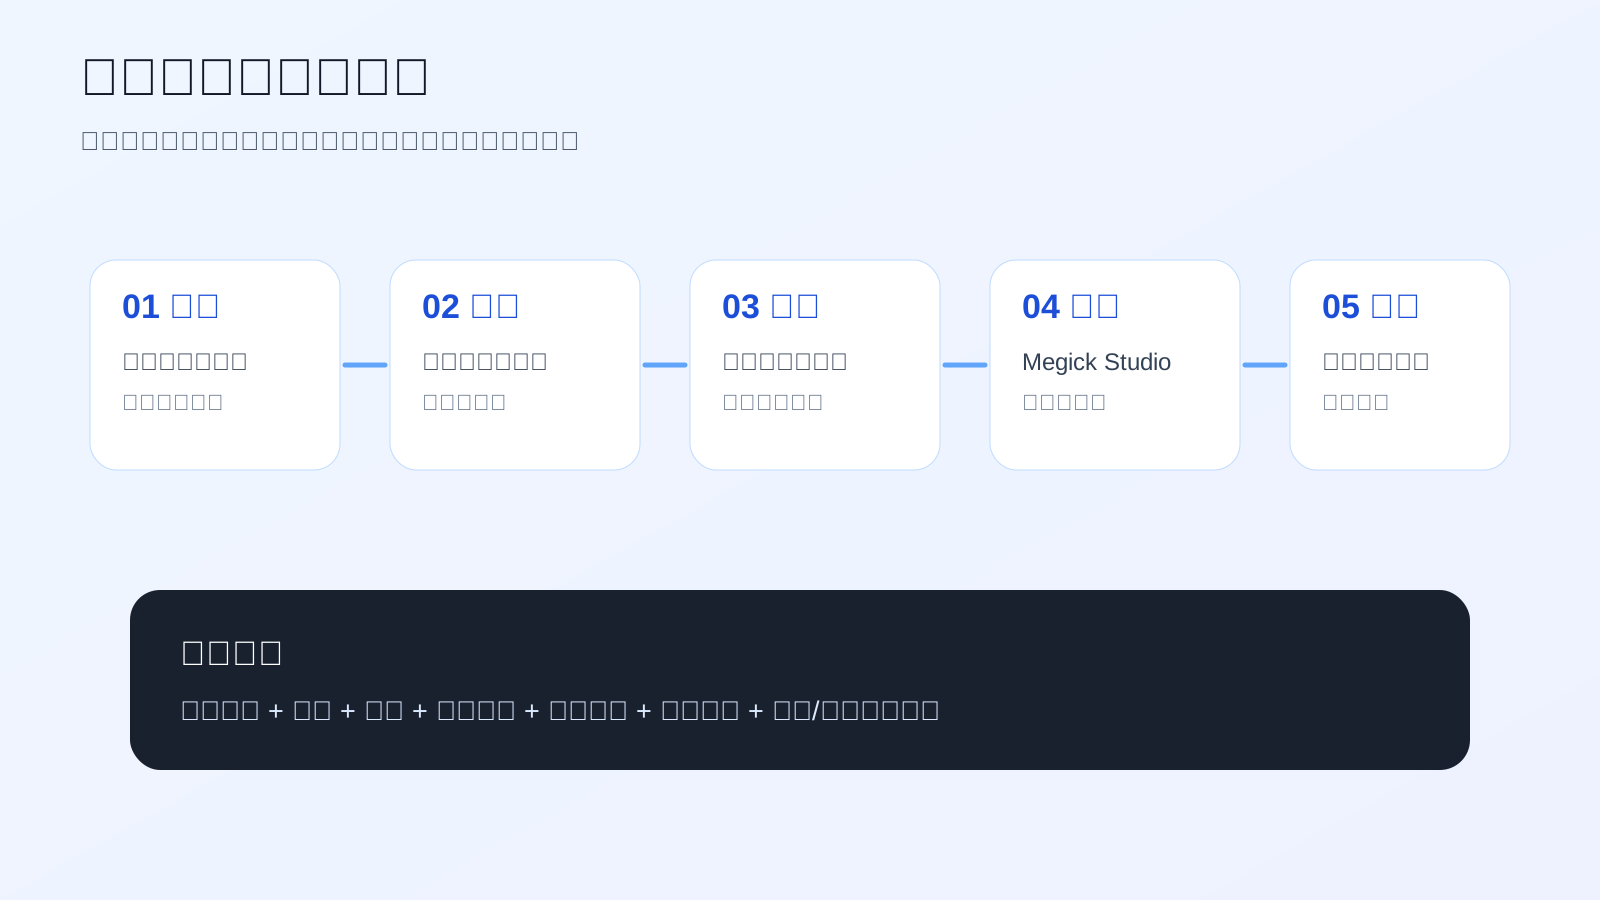
Step One: Identify the Content Type First
Different content types should not use the same generation method.
| Content Type | Better Approach | Core Focus |
|---|---|---|
| Douyin talking-head / educational content | Image-to-video + post-production subtitles | Stable subject, natural expression, clear subtitles |
| Xiaohongshu product recommendations | First-frame cover + subtle movement | Attractive cover, clean visual, consistent color tone |
| E-commerce product video | Product image-to-video | No product distortion, realistic material, simple camera movement |
| AI short-drama clips | Storyboard generation + edited assembly | Consistent characters, continuous shots, clear emotion |
| Brand advertising | Reference image + high-quality generation | Consistent style, lighting quality, restrained pacing |
Identify the content task first, then choose the model and generation method. This is more effective than studying model rankings first.
Step Two: Create a Visual Master Frame
A visual master frame can be a product hero image, a character design reference, a key visual for a short drama, or a cover image.
Its role is to lock in the visual style first.
This is where Megick Studio becomes particularly useful: use AI image generation to finalize the visual direction, then turn the stable image into motion. For beginners with limited budgets, this is usually more efficient than repeatedly generating text-to-video clips.
Step Three: Design Only One Primary Action Per Video
For a five-second video, it is best to ask the model to complete only one action.
For example:
- Product video: the camera slowly moves around the bottle;
- Character video: the person gently turns back and smiles;
- Food video: steam rises from a bowl;
- Fashion video: the model turns to show the silhouette of a jacket;
- Short-drama video: the character pushes open a door and enters a dim room.
The clearer the action, the more stable the result tends to be.
Step Four: Let Post-Production Handle Information Delivery
AI video is better suited to the role of visual footage, not a tool that must handle every part of the final content.
Titles, subtitles, stickers, prices, logos, transitions, sound effects, and voiceover can all be handled in post-production.
This is both more stable and better aligned with commercial publishing requirements.
4. Eight Prompt Templates Beginners Can Use Immediately
Template 1: General Text-to-Video
[Aspect ratio], [video type], [scene location], [subject description], [subject action], [camera movement], [lighting and atmosphere], [style and texture], [duration]. Add subtitles, title, and brand text in post-production.
Example:
9:16 vertical short video, modern kitchen setting, a glass of iced coffee sits on a wooden table, ice cubes move gently, the camera slowly pushes from the rim of the glass toward the body, morning natural light, clean and realistic lifestyle-photography texture, 5 seconds. Add subtitles, title, and brand text in post-production.
Template 2: General Image-to-Video
Based on the input image, keep the subject appearance, composition, and background stable. Let [subject] perform [one clear action], the camera [specific movement], overall atmosphere [style], duration [seconds].
Example:
Based on the input image, keep the product appearance, composition, and background stable. Let subtle highlights move across the bottle surface, with the camera slowly sliding from left to right. The overall atmosphere is clean, realistic, and has a commercial-advertising feel. Duration: 5 seconds.
Template 3: E-Commerce Product Short Video
9:16 vertical e-commerce video, [product] positioned in the center of the frame, [material/color] clearly visible, camera [push in/orbit/slide], background [simple environment], [lighting], highlight [key selling-point action], realistic and clean image, 5 seconds. Add text information in post-production.
Template 4: Xiaohongshu Cover Video
9:16 vertical lifestyle video, [person/product] in [scene], [subtle action], camera remains stable and slowly pushes in, overall color tone [clear/warm/premium gray], suitable for a Xiaohongshu cover, reserve headline space at the top, 5 seconds.
Template 5: Douyin Strong-Opening Video
9:16 vertical short video. In the first second, show a strong visual impact: [specific image]. Then [subject action], camera [movement], fast rhythm but stable visuals, suitable for a short-video feed, 5 seconds. Add title and subtitles in post-production.
Template 6: AI Short Drama Single Shot
9:16 vertical short-drama shot. [Character] stands in [location], with [emotional state], performing [action]. Camera [angle and movement], lighting [atmosphere], realistic cinematic feel, maintain consistent character appearance, 5 seconds.
Template 7: Educational Background Video
16:9 horizontal educational background video. [Theme-related visual elements] move slowly in the frame. The camera remains stable, with space reserved for explanatory subtitles. Clean, technology-focused, and not overly complex. Duration: 6 seconds.
Template 8: Brand Advertising Video
[Brand tone] advertising short film. [Subject] is in [scene], performing [action]. Camera [movement], lighting [description], image materials [description], restrained pacing, premium commercial-advertising texture, 5 seconds. Add logo and copy in post-production.
5. How to Choose a Generation Method for Different Scenarios
What Text-to-Video Is Best For
Text-to-video is suitable for idea exploration, atmosphere testing, abstract scenes, and concept shorts.
Its advantage is creative freedom. Its drawback is that character and product consistency may not be stable. Beginners can use it to find directions, but should not treat it as the final production method too early.
What Image-to-Video Is Best For
Image-to-video is suitable for products, e-commerce, people, IP, short-drama characters, and brand visuals.
Its biggest advantage is control because the first frame already gives the model a clear anchor. For commercial content, image-to-video is usually much more stable than pure text-to-video.
What Video Extension Is Best For
Video extension is suitable for lengthening a stable shot.
But it is not suitable for endlessly expanding a complex plot. During extension, keep movement continuous. Do not suddenly change the scene, character, or style.
What Multi-Shot Assembly Is Best For
Short dramas, advertisements, tutorials, and mixed talking-head edits are all better suited to multi-shot assembly.
AI generates each shot, while editing handles the storytelling. This is much closer to real video production than expecting one model to act as director, cinematographer, editor, and motion-graphics designer all at once.
6. Pre-Publishing Checklist: Do Not Rush to Post Until These 12 Items Are Ready
- Does the aspect ratio match the platform? For Douyin and Xiaohongshu, check 9:16 first.
- Does the first second give users a reason to stop?
- Is the subject positioned within the safe area?
- Are there distortions in faces, hands, or product edges?
- Is there any garbled text in the video?
- Were subtitles added in post-production and tested for mobile readability?
- Are there flickering or abnormal objects in the background?
- Is the camera movement too aggressive?
- Does the music rhythm match the edit points?
- Did you save the prompt and generation settings?
- Do commercial assets, portraits, and music have the appropriate usage rights?
- Have you prepared three cover versions for testing?
7. A Better Way for Beginners to Use Megick.com: Start With the Content Task, Not the Model
Beginners often get trapped in model comparisons:
Which one is more realistic? Which one is cheaper? Which one is faster? Which one is trending right now?
But a more efficient approach is to choose the workflow based on the content task first.
- For e-commerce: generate the product hero image first, then use image-to-video;
- For Xiaohongshu: create the cover image first, then add subtle-motion cover video;
- For Douyin: write a three-second hook first, then generate a strong opening shot;
- For short dramas: establish the characters first, then generate single shots according to a storyboard;
- For brand ads: define the brand visual system first, then test multiple ad-shot variations.
In Megick Studio, you can connect AI image generation and AI video generation into one workflow: establish the visual style first, test camera movement next, then use stable shots for editing.
For beginners, this process matters much more than repeatedly switching tools.
For tutorials, you can view the Megick.com video-generation tutorials directly:
https://megick.com/tutorials
8. One Final Thought for Beginners
An AI video generator is not a wish-granting machine.
It is more like a camera that will not ask follow-up questions. Give it a vague emotion, and it will improvise randomly. Give it camera direction, action, lighting, aspect ratio, and boundaries, and it has a much better chance of producing usable footage.
The people who succeed with AI video in 2026 will not be the ones who chase every new model.
They will be the ones who can break an idea into shots, turn each shot into a prompt, and edit the footage into a finished video.
Avoid the pitfalls first, improve efficiency second, and only then think about scaling.
References
- Google DeepMind: Veo 3 prompting guidance, emphasizing visual detail, camera movement, style, lighting, characters, locations, action, and sound design.
- Runway: Gen-4 Video Prompting Guide, emphasizing input-image quality, concise prompts, motion-focused descriptions, and positive language.
- Runway: Gen-3 Alpha Prompting Guide, emphasizing direct descriptive prompts and avoiding unnecessary repetition of the input image in image-to-video workflows.
- Public Kling AI materials: Product information about text-to-video, image-to-video, duration, aspect ratios, and different generation modes.